Resident Dragon: Christmas List - Behind the Scenes on TET's 2D Animated Christmas Short Made with Reallusion's Cartoon Animator 5
 |
| A scene from Christmas List a short by TET. |
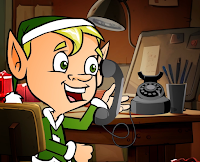
I released my end of year holiday short, Resident Dragon: Christmas List, staring my avatar, TET, Red the Dragon, Cool Froyd the Cat, and Grrr Dog. You will be seeing more of these original characters in the future as I'm developing a six part series. Watch the holiday short below.
Since it's been a while since I've done a behind the scenes deep dive into one of my own productions, I thought this animated short would be ideal to share some of my takeaways for what I learned or did that I think may help you in your own animated projects.
Resident Dragon: Christmas List was completed over the space of around three weeks, working mostly a couple of hours in the evenings, then maybe 4-5 hours over the weekends. Here are my thoughts on the process.
Writing the Script
 |
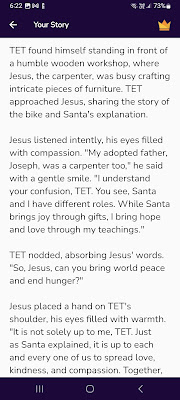
| Excerpt from one of AI Storywriter's Generations. |
I've been experimenting a lot with AI for writing scripts and I've come to the conclusion AI doesn't really understand how to write short, punchy comedy. Having said that, if you didn't find my animation funny, I imagine you're thinking I don't either... but I feel I have a better grasp than AI all the same.
Putting my premise (TET goes to the North Pole to Confront Santa about his previous year's Christmas list) into an AI Storywriter app I kept getting lengthy morality stories about the true meaning of Christmas. That said, it was the AI that came up with adding Jesus into the mix as a carpenter/toy maker so, as I've written previously, AI's can be good for bouncing ideas off.
I wrote my final script from scratch, incorporating some of the ideas, from the AI and removing all the sweet sentiment and heart... in favor of streamlined dialogue and a focus on the funnier ideas.
Setting Up the Scenes
If you've followed my work for a long time you'll know I use Reallusion's Cartoon Animator 5 to do all my animation.
This production only has two scenes. The first, outdoor snow scene in front of Santa's house, is virtually off the shelf with very few changes. It's almost entirely a single backdrop image with snow drifts, and shadows added from other packs. Santa, Rudolph, and Frosty the Snowman come from the same pack.
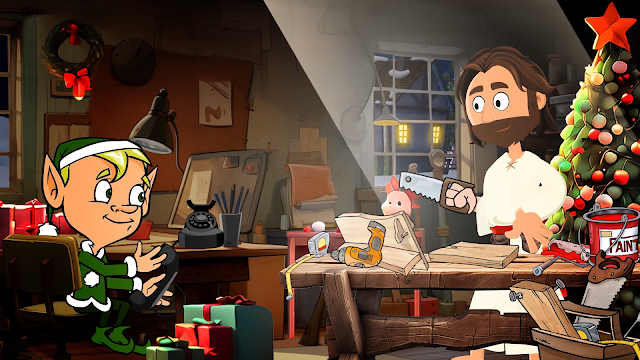
The interior workshop scene is more typical of my approach where I gather backgrounds and props across multiple packs to build a scene (making it impossible to individually attribute all the developers to their creations). You'll notice a mix of outlined and non outlined props. I wrote an entire post with Tips on How to Create Background Scenes in Reallusion's Cartoon Animator Using Your Content Library
One thing of note is the phone the Elf uses. Initially the handset was not removable but I exported it as a PSD prop and separated it out. The cord you see in the animation is not part of the phone prop. It's a microphone cable from one of Garry Pye's packs that I had to animate so it would move with the handset.
Usually I'll have an idea of where all my characters will be standing in each scene and build around that, making sure nothing in the background distracts you from them.
Animating the Camera and Characters
I always add my character dialogue first to get the timing correct. Next I'll plan and key frame all my camera shots within the scene for two reasons. The first is that it creates an animatic of the scene. Essentially a motion comic with just the lip sync and framing. The second is, it shows me what actually will be on camera and needs animating - there's no point animating a character if they're not actually in the shot.
Animate the Lead Characters
It makes sense to spend the most time animating the lead (or speaking) characters. In my first scene TET and Santa are the lead characters.
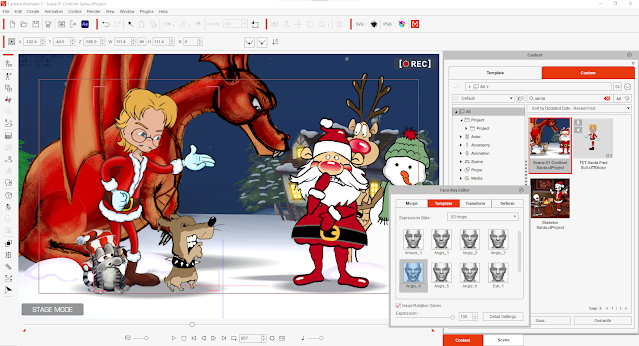
To animate them I start by adding template face expressions that align with what they are saying using the Face Key Editor. These expressions will blend into each other so you need to place a key frame where the expression starts and where you want it to end so that the expression is held for that duration.
 |
| Using the Face Key Editor Face template expressions. |
Next I'll animate the bodies using pre-made motions that kind of match what the character is doing. In the timeline I'll remove sections of the motions that don't work, and shift other sections around to better match what the character is doing. I'll then use the blend handle at the start of the motion to blend everything together.
If you have characters with sprite hands these, are often animated as part of predefined motions, but I will go through and change the various hand sprites for more fluid transitions between positions or just to get a sprite that better matches with what the character is saying.
Finally I'll open up the Face Puppet Editor and do I live recording to add pupil movement, eyeblinks, and subtle head movement. All of this helps to make the character feel more alive and less like a robot.
If you'd like a more detailed insight into my character animation workflow I wrote about it in my post, The Lazy Animator Versus Garry Pye - Comparing Character Animation Workflow in Cartoon Animator.
Animating the Minor Characters
All the other characters in my first scene are only there to make the scene more interesting than just TET and Santa talking outside in the snow.
The Resident Dragon Cast because having at least Red the Dragon there implies that maybe TET got to the North Pole by riding Red. Froyd and Grrr Dog are just along for the ride.
Obviously Rudolph and Frosty the Snowman help give you the idea this is Santa's place and TET hasn't just bumped into Santa somewhere randomly.
For Rudolph, I simply applied a pre-made stand idle motion that loops for the whole animation with eye blinks etc. puppeted in.
Red the Dragon had to have a sitting idle motion key framed from scratch, which I then looped for the whole animation, then I added puppeted head movement and eyeblinks etc.
Grrr Dog uses a quadruped template so I was able to string together some pre-made dog motions. I have to do some customization on them though as he's almost literally a one sprite character, and his stubby legs distort his body horribly if you put him in a sitting position.
 |
| Grrr Dog's Timeline showing the use of pre-made motions with modified keys to correct his sitting position. |
Froyd the cat I simply saved all his animation, where he sits around meowing, from my previous production, Resident Dragon: Charred Breakfast, as a perform motion, and dropped it right into this one. All I had to do was split it up to match when he was in shot.
Video Editor and Additional Audio
Once all the animation was done I exported both animated scenes as MP4 files and brought them into ShotCut (the free, open source video editor).
Aside from adding titles to the beginning and end the only other visual editing I really did was to add a radial gradient blend filter to make the edges of each scene darker and to focus more light on the speaking characters.
 |
| The finished edit in Shotcut. A simple gradient filter darkens the edge of the image. The Green tracks show just how little audio I added to the mix. |
My audio mix was simple too, keeping the audio of the voices from CTA, adding soft wind noise for the exterior, some sawing noises in the workshop, and then Christmas music from YouTube's music library.
---o ---o--- o---
Hopefully you found this behind the scenes look interesting and maybe picked up at least one tip along the way.

