Creating a 360 Head, Adding Spring Bones and Color Management - My Character Design Process for Puppet, Bone Rig 2D Animation in Reallusion's Cartoon Animator (Part 5 - Final)
I realize writing a five part series over almost three months makes creating a G3-360 SVG vector character in Cartoon Animator 5 look like a long and drawn out process. However, I want to assure you that, once you've designed your character and divided up, or created the bare minimum of required sprites, the actual rigging process should maybe take an afternoon to a day at most - excluding testing and refining the rig.
Despite spending a lot of time debugging the Inkscape rigging template provided by Reallusion, I've also only been working on my character when I've sat down to write these articles every second week. (BTW, if you haven't read Part 1, Part 2, Part 3, or Part 4, just follow those links... it's been quite a process). I expect my next character will take no more than a couple of days to rig.
To continue on, this week I fix the final few character design issues, then I rig my character's G3-360 head, add spring bones, and set up the color management system.
Final Character Design Tweaks
Since bringing my Inkscape template into Photopea fixed everything I decided to continue using this free online graphics editor to finish off my character.
As it turns out Inkscape wasn't actually deleting folders and layers properly because all kinds of folders, both new and deleted, appeared in my template when I opened it in Photopea. Once I cleaned all these out, including my rogue earing bones, my template imported into Cartoon Animator with no issues.
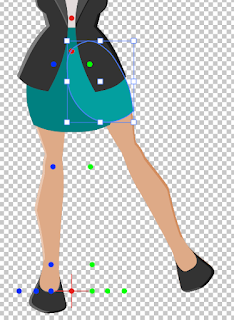
That just left my risque skirt design flaw which I fixed by adding some skirt elements to her thigh sprites. So long as the character doesn't lift either leg too high it fixes the problem.
Rigging the G3-360 Head
When rigging a G3-360 head I have a standard process I follow that utilizes only the existing sprites needed for a front facing, human head.
I don't usually add extra sprites for side facing noses or mouths. You really only need those extra sprites on a human character if you have a fairly cartoonish design or you're turning the character's head to a full 90 degree side view.
 |
| Setting up the Character's G3-360 head. The step numbers approximately match the steps outlined in the article. |
- Once inside the G3-360 head set up tool, click the Quick Setup button and apply the default settings.
- Choose the middle left angle position and, using transforms, deforms, etc. make the head look correct for a 315 degree, side facing head. It's a good idea to start with the face shape sprite. Get that correct and then position everything else in relation to it. Don't be afraid to really deform sprites and make those that move further away slightly smaller etc.
- When you're happy with this view, mirror copy it to the right facing angle. Note - Make sure the sprite box is deselected or all your sprites will be mirrored and you'll have to flip them back.
- Switch back to the left middle angle and use the copy/paste button to copy the middle angle to the left top angle and the left bottom angle.
- Switch to the left top angle. Rotate the entire head about 40 degrees so the character is looking up. Make sure you move the head back on the neck a little so it doesn't look like the head detaches from the neck.
- Switch to the left down angle and rotate the head down about 15 degrees so it looks like the character is looking down.
- Repeat these steps on the right facing side (i.e. copy/paste the right facing head etc.).
- Switch to the middle top angle and work on this until it looks correct for the character looking up. Make sure you preview a lot with the left and right looking up angles to make sure everything moves in line as the head angle changes.
- Repeat for the middle bottom angle.
- Make any final tweaks to each angle and you're done.
Once you've finished setting up the head exit out of the head set up tool (you may want to save your head profile first just in case you need to update the character again and don't want to set up the head from scratch). You may want to check the character's layers to make sure the back hair sprite is sitting behind all other sprites. Check to make sure everything else is in the correct layer order too.
Spring Bones for the Hair
If your character has long hair then adding some spring bones to it is a no brainer. It may also be worthwhile experimenting with adding spring bones to any lose fitting clothing such as skirts (or body parts like a large belly etc.).
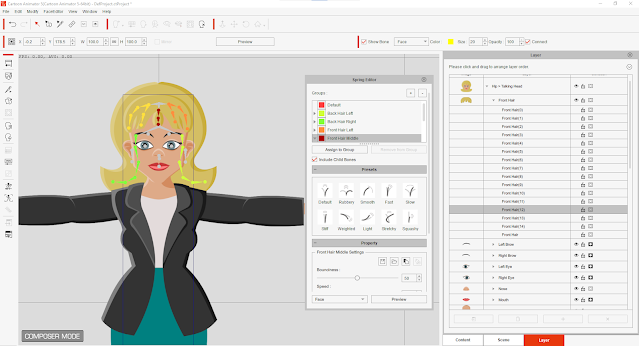
For mine I simply added some additional bones to the front and back hair sprites, grouped the bones into left and right sides in the Spring Bone editor while leaving the bones themselves on the default settings.
Remember, when you're grouping your spring bones leave the root (or base bone) out of the group. This bone serves as an anchor point for the physics of spring bones to react against. If you include it you may get an error or your spring bones just won't work.
Color Management
I'd always envisioned my character being capable of having her outfit modified through color management. Specifically being able to remove her business outfit so she could also show off her beach body in her swimsuit. Setting this up should be the last stage in rigging your character.
Color Management can be initially confusing, particularly if you've got a very detailed character with hundreds of vector shapes. I tried to keep mine simple which is why I used very minimal highlighting and shadow. Even so, I still had a lot of shapes to sort through.
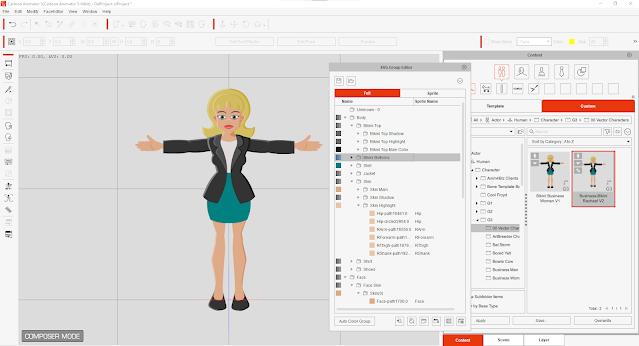
When you first fire up the SVG Group Editor (which is how you group everything for Color Management through the SVG Color Adjustment tool) you have two sort options, by color or by Sprite Name.
I chose by Sprite Name as this at least gave me extra clues for where to look when trying to see each color because, even though selecting a color would cause that selection to flash on the character, you won't see the flashing color if it's hidden behind another layer. Note: There is a transparency button at the bottom of the group editor that makes everything temporarily transparent so you can see which area is flashing as 'selected'.
It took me maybe a couple of hours to sort all my colors into groups I could easily understand, specifically making sure each item of clothing was in its own group so it can easily be switched on or off using the transparency setting.
This whole process of color management isn't hard but it is definitely made easier if you keep it front of mind when you're designing your characters. You'll definitely want to limit your color palette using only what is necessary for your character's design.
The finished G3-SVG, Character
I must admit this whole process took me far longer than expected, even for a first time vector character rigging experience.
This character is the first one in years that I've had to create all the face sprites for from scratch. When I create G3-PSD characters I have a project file that auto generates these from a morph based head.
I really did not expect to come up against so many issues with the Inkscape template. I'm hoping when Inkscape 1.3 is released some of the issues I experienced will be fixed (deleted folders not actually being deleted for one).
I'm almost tempted to change my vector editor to Photopea which gives me the best of raster and vector based graphics editing... except I just don't like editing graphics in a browser. Particularly when it rasterizers vectors on screen so they no longer look like vectors.
Despite that I will still be using Photopea to do a final pass on my templates if I keep having the same issues experienced making this character.
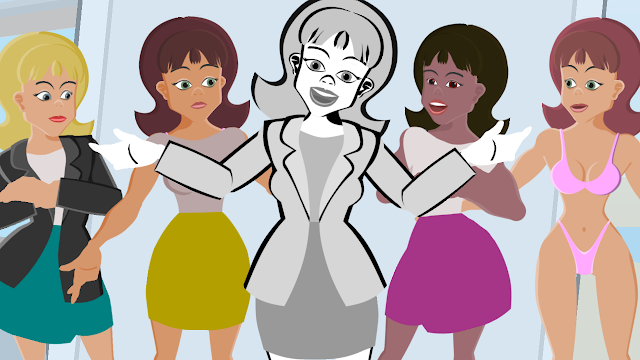
With all that now behind me I'm very happy with how the final character, who I'm calling Business-Bikini Rachael turned out. It's quite fun creating variations of her using the color management system. Check some of them out in the image below.
The character is available to buy from my Reallusion Store where you can see a short video of her in action.
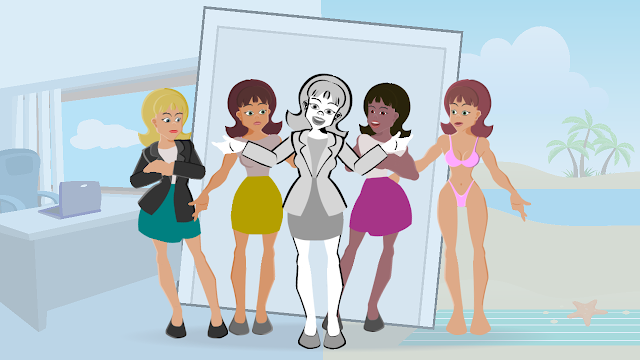 |
| Variations of Business-Bikini Rachael create just by adjusting settings in the SVG Color Adjustment Tool. |

Comments
Post a Comment
This blog is monitored by a real human. Generic or unrelated spam comments with links to sites of dubious relativity may be DELETED.
I welcome, read, and respond to genuine comments relating to each post. If your comment isn't that save me some time by not posting it.